Cheese Making For Beginners:
Taught by Katy Clayton.
Basics:
There is several ways to classify Cheese. The age of the cheese, the type of animal
milk used, and the hardness of the cheese are all ways of classifying cheese.
Age: The
age of the cheese will depend on how much time is given from production to
consumption. Some examples are:
Fresh- Cottage, Ricotta and farmer cheeses
Quick Aged: Farmhouse Cheddar
Aged: Sharp Cheddar, Bleu and Parmesan
Type of
Animal Milk: There is several type of milks used; cow, goat, sheep and water
buffalo milk.
Hardness of
the cheese: The hardness of the cheese
will depend of the moisture content of the cheese. Some examples are:
Very Soft: Mascarpone and Neufechatel
Soft: Brie and Feta
Semisoft: Baby Swiss and Butterkase
Semihard: Gouda
Hard: Parmesan and Romano
Milk:
As you are preparing to begin making cheese you will
need to decide what kind of milk you will use.
That can depend on what you have available and cost. Cow’s milk is the
most readily available. There’s
pasteurized or raw cow’s milk.
Pasteurized milk is the cheapest and more readily available to us. When using pasteurized milk you will need to
compensate for the breakdown of the proteins that happen during the
pasteurizing process.
After you’ve decided what type of milk you are using
you will need to decide whether to use skim or whole milk. Skim milk is better when making hard cheeses.
When using it in softer cheese recipes, you will have a lower fat cheese but it
will produce less cheese. Whole milk has
more fat content and will produce a higher yield. In addition your cheese will be creamer and
richer in flavor.
Cheese-making
Supplies:
Acidifier: This will help to convert
the milk sugar to lactic acid and “ripen” the milk. This is usually done, using a special
bacterial starter culture. The two that
are most common are mesophilic culture and
thermophilic culture. You can buy these online through Amazon; there
is also a local carrier here in FV who sells almost all of the cheese supplies
you will need.
Rennet: Rennet is an enzyme found
in the 4th stomach of a newborn calf or kid that separates the milk
into curds and whey. There is also vegetable rennet that can be used.
Lipase: Lipase is also an enzyme; it
releases fatty acids that create aroma and tastes for certain cheeses. Lipase is destroyed when milk is pasteurized.
Citric
Acid: Citric
Acid is used for fashioning mozzarella cheese.
It will help with making the curds stretchy.
Calcium
Chloride: Calcium
Chloride helps pasteurized milk to develop a firmer curd setting, making it
easier to cut the curds.
Salt: Coarse, non-iodized cheese salt draws moisture
from the curd, quickens the aging and gives flavor to your cheese. Iodized salt
will slow the aging of the cheese.
Flavorings: If making orange, yellowish
cheese you will need a flavoring and coloring called Annatto. Annatto is a dye
derived from a tree and is used to give cheeses and butter its rich coloring.
Other
Supplies:
You will also need a large stainless steel, enameled or glass pot; a slotted
spoon, measuring cups, non-chlorinated water, a colander, butter muslin or cheesecloth,
a digital thermometer, a cheese press and possibly cheese wax.
When beginning cheese making, two of the easiest cheese
to make at home are, Farm House Cheddar and Mozzarella.
Recipes:
Ricki’s
30-Minute Mozzarella
From Home Cheese Making by Ricki Carroll
The
following recipe is a quick and easy way to make fresh Mozzarella at home in
less than 30 minutes. Make sure the milk you use for this cheese is NOT ultrapasteurized,
otherwise you will end up with Ricotta instead of Mozzarella.
Ingredients
2 level teaspoons citric acid
1 gallon pasteurized whole milk (see Note in Step 1 below)
¼ teaspoon lipase powder (see Note in
Step 1 below), dissolved in ¼ cup cool water and allowed to sit for 20 minutes,
for a stronger flavor (optional)
¼ teaspoon liquid rennet (or ¼ rennet tablet) diluted in ¼ cup cool,
unchlorinated water
1 teaspoon cheese salt (optional)
Preparation
- Add the citric
acid to the milk and stir thoroughly. (If using lipase, add it now) Note:
You may use skim milk, but the yield will be lower and the cheese will be
drier. If you add lipase to this cheese, you may have to use a bit more
rennet, as lipase makes the cheese softer. Try the recipe without it and
experiment later.
- Heat the milk to
88 degrees F. (The milk will start to curdle)
- Gently stir in
the diluted rennet with an up-and-down motion, and continue heating until
the temperature reaches 105 degrees F. Turn off the heat and let the curd
set until you get a clean break when you insert the thermometer at a 45
degree angle. This will take only a few minutes.
- The curd should
look like thick yogurt. If the whey is still milky, wait a few more
minutes.
- Scoop out the
curds with a spoon and put them into a two-quart microwave-safe bowl.
Press the curds gently with your hands, pouring off as much whey as
possible. Reserve the whey.
- Microwave the
curds on high for one minute. More whey will precipitate from the curd.
Again, drain off all excess whey. Quickly work the cheese with a spoon or
your hands, forming it into a ball until it is cool enough to touch. (Wear
rubber gloves; the cheese has to be almost too hot to touch before it will
stretch.)
- Microwave two
more times for 35 seconds each. After each heating, work the cheese into a
ball until it is cool enough to touch. Drain all excess whey each time.
- Knead quickly
like bread dough until it is smooth. Sprinkle on the salt, if desired, while
you are kneading and stretching. When the cheese stretches like taffy, it
is done. If it breaks, the curds will need to be reheated.
- When the cheese
is smooth and shiny, it is ready to eat. Although this mozzarella is best
eaten right away, if you must wait, cover it and store in the
refrigerator.
- Yield: ¾ to one
pound
Tip: For a firmer cheese, use more rennet.
If your cheese is too hard, use less rennet. If the curds turn into the
consistency of ricotta cheese and will not come together, change the brand of
milk; it may have been heat-treated at the factory to too high a temperature.
Most of all, be patient. When you get this to work, you will never stop eating
it.
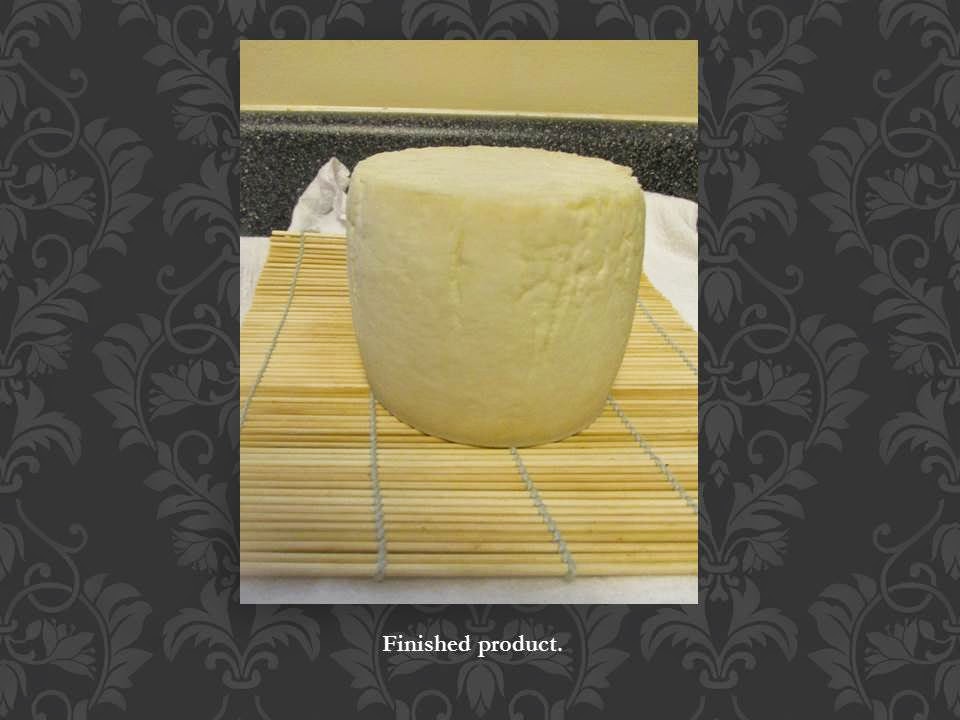
Farmhouse
Cheddar:
This recipe was adapted from the Reformation Acres Blog.
Ingredients:
2 gallons of milk
½ tsp calcium chloride, dissolved in ½ cup of water
50+ drops of Annatto, dissolved in ¼ cup water
(optional, only if you want the orange, yellow coloring for you cheese)
4oz. mesophilic culture (or direct set packet,
freezer dried)
½ -1 tsp liquid rennet, dissolved in ¼ cup of water
1 TBS salt
Preparations:
·Add the milk to the large pot.
·
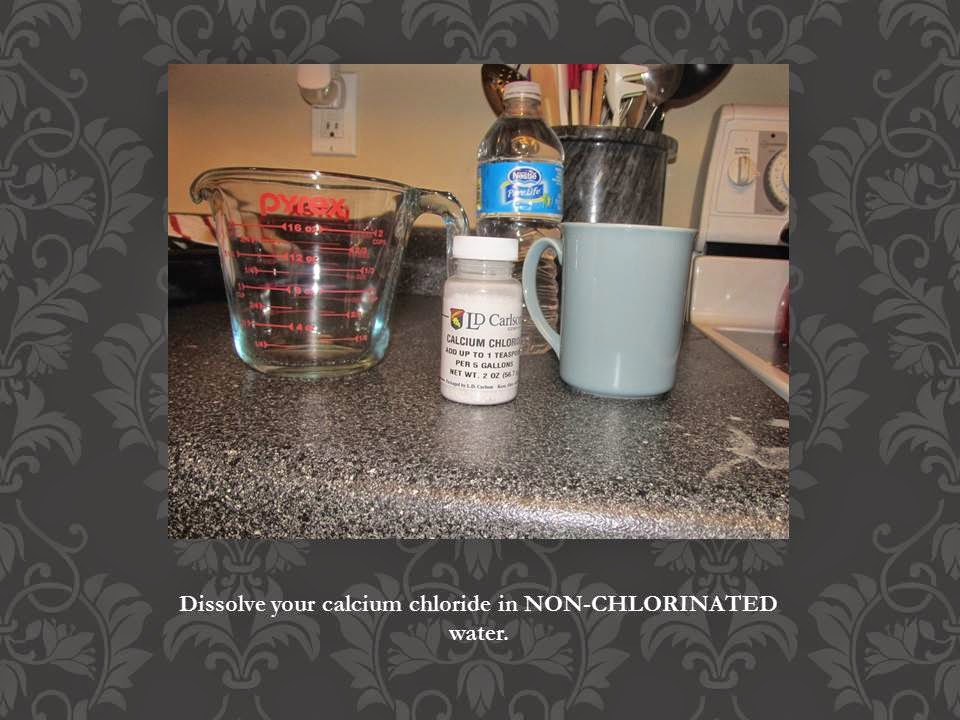
Thoroughly dissolve the calcium chloride (DO NOT use chlorinated water)
·
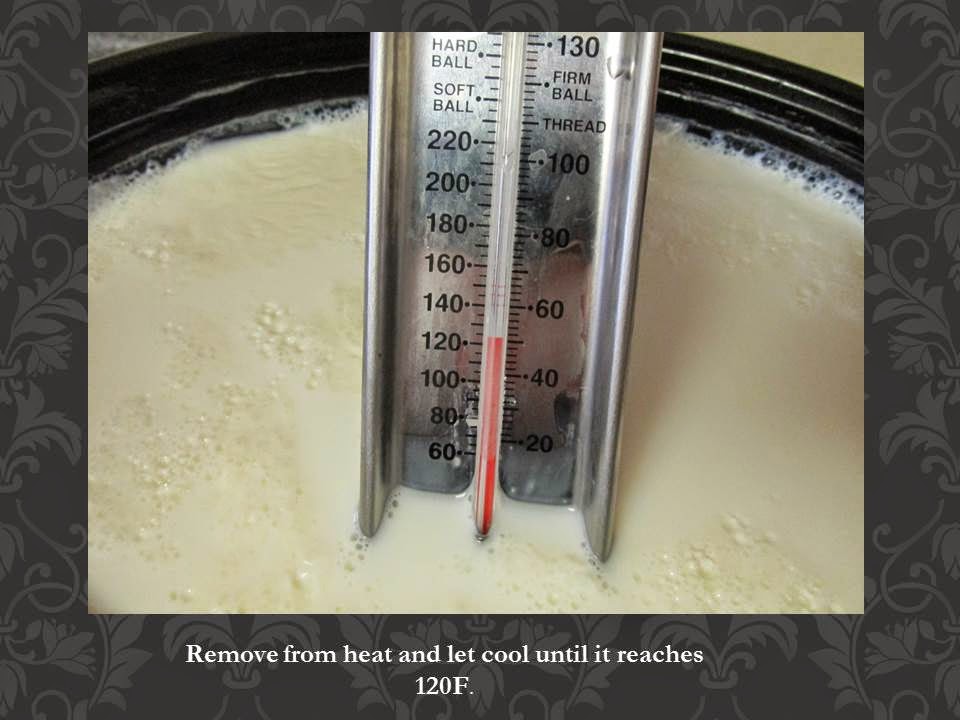
Heat the milk to 90 degrees, stirring.
·
Add the Annatto if doing so, and add the mesophilic culture and stir
until melted. Cover the pot and allow sitting
and ripening for 45 min.
·
Add dissolved rennet through the slotted spoon to try and distribute
evenly. Stir gently for one minute in a
gentle up & down motion. Cover the pot and all to sit forming curds for 30
min.
·
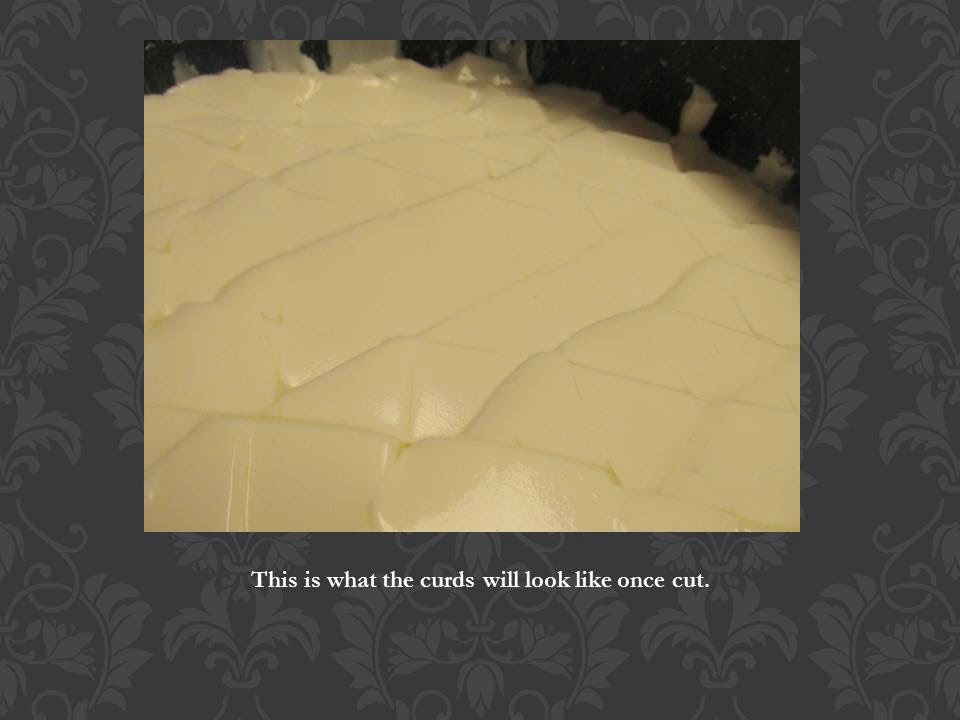
Test for a clean break by using a knife. It should lift clean and smooth and the void
should fill with whey. If clean, cut the curds into ½ inch cubes. Allow to sit
and heal for 5 min.
·
Indirectly heat the curds to 100 degrees F, in your sink, aiming for a
rate of 2 degrees every 5 min. You will want the hot water that you fill your
sink with to reach between 100-110 degrees F; stir frequently. The curds will
shrink up a bit and the yellow whey will increase. This is the most labor
intensive part of the process and will take about 45 min. You may have to drain and refill the sink
several times.
·
Hold at 100 degrees F for 5 min.
·
Strain the curds through a cheesecloth and colander.
·
Tie up the cheesecloth and let hang over a bowl for 1 hour.
·
Take down the cheesecloth and break the curds apart with your
fingers. Add the 1 TBS salt.
·
Line your cylinder with the cheesecloth on your press. Add the curds and let press for 15 min at 4-5
pounds of pressure.
·
Take the curds out of the press, and turn it upside down in the press
(still with the cheesecloth. You will
press at 10-12 pounds for 12 hours.
·
Remove from the press and unwrap.
Air dry for 1-2 days, turning at least twice a day.
·
Yield: about 2 lbs.
Tip: Unwaxed, this cheese will keep for 2 weeks in the refrigerator or grate
and freeze. To age the cheddar, seal in wax for up to three months and store at
a temperature of 45-60 degrees F.
Waxing and
Aging:
When waxing you will need to find food grade wax,
which is yellow, red or black. You will
need to melt the wax on a double boiler until it melts completely and reaches a
temperature of 225-240F. The cheese
should be dipped for at least 6 seconds.
If brushing the wax on, be sure to not use a synthetic brush (its bristles
will melt in the wax.) Note: All wax is highly flammable. Be sure to keep a close eye on it! Never leave it unattended while heating. Do not use a microwave to heat wax.)
When aging your cheese you can use your existing
refrigerator, but it is 10-15F cooler than ideal and has a tendency to suck
moisture out of anything that is not protected.
To protect the cheese, place it in the warmest part
of the refrigerator. Use an airtight
container to keep it from drying out. You can control the humidity in the
container by using a wet paper towel crumpled in one corner.
The ideal temperature to age cheese at would be
52-55F. You can modify an old fridge or
use a wine fridge.
Local Cheese
Making Supplier:
Homesteader’s Brew Supply
121 Raleigh St., Fuquay Varina
(919)290-3959
Open from 10am-7pm